The Ultimate Guide to Laptop DC Jack Replacement
A laptop that won’t charge or has a rapidly depleting battery can be a major inconvenience. Often, the culprit is a faulty DC jack. This guide will navigate you through the process of replacing the DC jack, ensuring your laptop is back to its optimal charging state.
Tools You’ll Need:
- Screwdriver set
- Needle-nose pliers
- Soldering iron and solder
- Replacement DC jack
Step-by-Step DC Jack Replacement:
1. Setting the Stage:
Switch off your laptop and unplug it. If your laptop has a removable battery, take it out. Flip the laptop and unscrew the bottom panel. Remember the placement of each screw as they might vary in size.
2. Accessing the Innards:
With the screws out, use a plastic tool or a credit card to gently pry open the bottom panel. Avoid excessive force to prevent damage.
3. Spotting the DC Jack:
Typically located near where the charger plugs in, the DC jack is connected to the motherboard via a few wires.
4. Detaching the Old Jack:
Carefully disconnect the wires (black, white, and red) from the old jack using the pliers. Note their positions. Then, desolder the old jack’s metal legs and lift it off the motherboard.
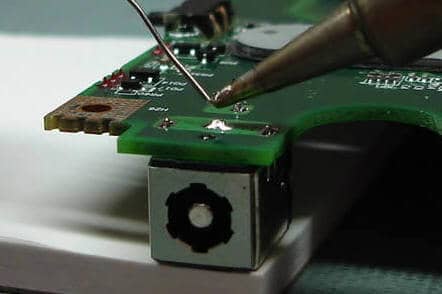
5. Welcoming the New Jack:
Position the new DC jack’s legs in alignment with the motherboard’s holes. Solder each leg, ensuring no excess solder creates a bridge between them.
6. Wiring the New Jack:
Reconnect the wires to the new jack: black to the outer tab, white to the center, and red to the remaining tab.
7. Testing Phase:
Before sealing everything, test the new jack. Plug in the charger and ensure the laptop charges correctly.
8. Wrapping Up:
Once satisfied, reattach the bottom panel and secure it with screws. Insert the battery, turn on the laptop, and enjoy uninterrupted charging!
For comprehensive insights and assistance on DC jack replacement, reach out to our experts. We’re here to ensure your tech stays in top shape.